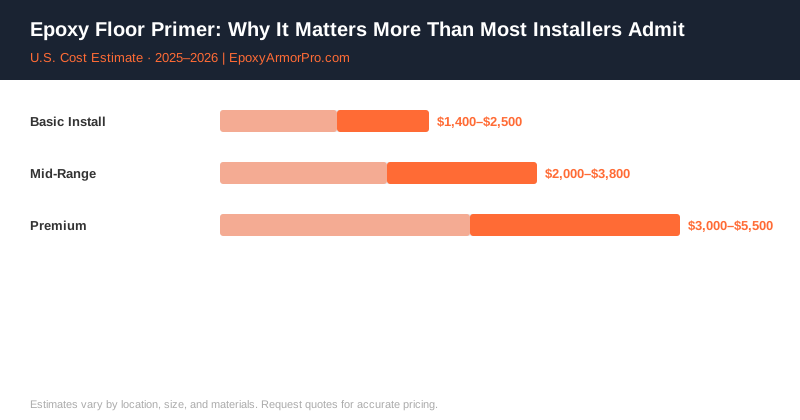
Skipping primer saves $0.20–$0.50 per square foot on a typical install. It also accounts for a disproportionate share of callbacks, peeling, and delamination problems. The math doesn’t favor skipping it — but plenty of contractors and DIYers do it anyway, usually because the floor “looked fine” without it.
Here’s what epoxy primer actually does, when you genuinely need it, and when you can reasonably skip it.
What Epoxy Primer Does
Concrete is porous. A typical garage slab has millions of microscopic pores across its surface, filled with air, moisture vapor, or whatever has soaked in over the years. When you apply epoxy directly to this porous surface, two things can go wrong:
Outgassing — Air or moisture vapor trapped in the concrete pores gets displaced when the warm, sealing epoxy covers the surface. If the gas can’t escape fast enough, it pushes up through the still-wet epoxy, creating pinholes and bubbles. The finished floor looks like it has a rash.
Poor penetration — Dense or lightly-open concrete surfaces don’t allow the epoxy to penetrate deeply. The bond is surface-level rather than mechanical, which means lower adhesion strength.
Epoxy primer solves both problems. Primers are formulated to be much thinner — lower viscosity — than base coat epoxies. They flow into and fill the pores before the base coat is applied. This does two things: it displaces the trapped air before the film-forming base coat seals the surface, and it creates a bonding bridge that the thicker base coat adheres to rather than fighting to penetrate.
According to the Structural Concrete Society’s guidance on protective coatings, using a purpose-formulated penetrating primer before an epoxy base coat can improve adhesion strength by 20–40% compared to priming with a thinned version of the base coat — a common but inadequate substitution.
Types of Epoxy Primer
Not all primers serve the same function. There are two main categories for residential and commercial concrete floors:
Penetrating Primers
These are thin, low-viscosity epoxy formulas designed to flow into concrete pores as deep as possible. They’re not building any coating thickness — their job is penetration and pore-filling.
Best for:
- Standard residential garage floors in good condition
- New concrete 28+ days cured with no known moisture issues
- Floors that tested below 3 lbs MVER on calcium chloride test
- Any time outgassing has been a problem on previous installs in similar conditions
Application: roller or squeegee, thin coat, don’t apply too thick or you defeat the purpose. Typical coverage rate is 250–350 sq ft per gallon.
Moisture-Mitigation Primers
These are specialized epoxy formulas designed to tolerate — and block — elevated moisture vapor transmission from below the slab. They form a substantially thicker, denser film than penetrating primers and contain chemistry specifically designed to remain bonded under moisture pressure.
Standard epoxy base coats can’t tolerate MVER above 3–5 lbs per 1,000 sq ft per 24 hours (per ASTM F1869). Many residential garage slabs — especially those poured before 1980 without a vapor barrier, or in high-water-table areas — exceed that threshold.
Best for:
- Slabs with MVER above 3 lbs (calcium chloride test result)
- On-grade slabs with no vapor barrier beneath them
- Any floor where previous coatings have bubbled or lifted
- Basements and below-grade applications
Application: requires thorough mixing, applied in two passes (crossing directions). Some moisture-mitigation primers have a short recoat window — follow manufacturer timing exactly.
| Primer Type | Material Cost | Installed Cost | When Required |
|---|---|---|---|
| No primer | $0 | $0 | New slab, perfect conditions only |
| Penetrating epoxy primer | $0.15–$0.30/sq ft | $0.20–$0.50/sq ft | Most residential installs |
| Moisture-mitigation primer | $0.35–$0.70/sq ft | $0.50–$1.00/sq ft | High moisture, old slabs, basements |
| Specialty penetrating (low-viscosity) | $0.40–$0.80/sq ft | $0.60–$1.20/sq ft | Very dense or polished concrete |
What Happens If You Skip Primer
Skipping primer on a floor that doesn’t need it (new, clean, well-cured, low moisture) is a defensible choice — some professional installers skip primer on straightforward jobs and get good long-term results.
Skipping primer on a floor that does need it is where problems start:
Outgassing pinholes — Within days of application, tiny bubbles appear across the floor surface. They’re not always visible immediately — sometimes you notice them as the coating finishes curing. They can’t be repaired without sanding and recoating.
Early delamination — On high-moisture slabs, moisture vapor pushes up under the coating. Without a moisture-mitigation barrier, the film can start lifting in isolated spots within weeks. This gets worse over seasonal moisture cycles.
Adhesion failures under load — Vehicle traffic on an unprimed floor that bonded adequately to bare concrete can start showing tire marks, wheel scuffs, and eventually delamination in traffic lanes — even when the surrounding floor looks fine.
When You Can Reasonably Skip Primer
There are legitimate situations where experienced installers skip primer:
- New concrete, 28+ days cured, never sealed — Fresh, open-pored concrete with confirmed low moisture readings (under 2 lbs MVER) and no previous coating history. The base coat’s first pass acts as a partial primer.
- Fast-turn commercial installs with polyaspartic systems — Some all-polyaspartic systems are formulated to bond directly without primer when applied to properly prepared concrete under ideal conditions.
- Re-coating an existing epoxy floor — Primer isn’t applied over existing epoxy; the adhesion is between two epoxy layers, prepared with scuffing.
Even in these cases, primer is rarely a bad idea. The cost is low; the insurance value is real.
How Primer Fits Into the Installation Sequence
Primer goes down immediately after grinding and cleaning — before any base coat. The complete sequence:
- Diamond grind to CSP 2–3
- Clean and vacuum thoroughly
- Apply primer, allow to cure (4–12 hours typically)
- Apply base coat within the recoat window (most primers require the base coat within 24 hours while the primer surface is still “green”)
- Flakes, topcoat follow
The “within the recoat window” timing matters. If you let primer cure past its recoat window — typically 24–48 hours at normal temperatures — its surface can become too smooth and dense for the base coat to bond to properly. You’d need to sand it before applying the base. Most contractors plan the schedule so primer and base coat go down on the same day or consecutive days.
For everything that happens after primer, see our epoxy flooring installation process guide and concrete prep guide.
Contractor Referral Disclaimer: EpoxyArmorPro is a contractor referral and cost information service, not a licensed flooring contractor. We connect consumers with independent, licensed, and insured contractors. We do not perform any flooring work directly. Cost estimates are averages based on market data and vary by location, project size, materials, and contractor. Always verify contractor licensing and insurance before hiring. Individual quotes may differ from estimates shown.