The adjuster left three days ago. The fans are gone. The concrete looks dry. You’re ready to put epoxy down so you can finally move on — and that instinct is going to cost you.
Concrete that looks dry after flooding is almost never dry enough for epoxy. What you can’t see is the moisture still migrating up from below. Apply coating too early and the floor delaminates in weeks, sometimes days. You’ll spend twice: once for the failed install, once for the do-over. Here’s how to get it right the first time.
Why Moisture Is the Enemy of Epoxy Adhesion
Epoxy bonds chemically to concrete. But when moisture vapor is pushing up through the slab — which it absolutely is after a flood — that vapor pressure breaks the bond from underneath. The coating looks fine at first, then bubbles appear, then it lifts in sheets.
This isn’t a low-quality product problem. It’s physics. Even the best 100% solid epoxy from the best contractor will fail on concrete that hasn’t dried adequately. According to the Concrete Moisture Council, moisture-related flooring failures account for more than 80% of all flooring installation warranty claims — and post-flood installs are the highest-risk scenario of all.
The 28-Day Minimum: What It Actually Means
The industry standard for new concrete is 28 days of cure time before coating. After flooding, you’re not dealing with new concrete — you’re dealing with saturated concrete, which takes longer.
Here’s how the timeline typically looks for a concrete slab after significant water exposure:
- Days 1–7: Surface dries. Fans and dehumidifiers help. The slab still holds enormous moisture internally.
- Days 7–14: Interior moisture continues migrating upward. Relative humidity inside the slab may still exceed 80%.
- Days 14–28: Most of the bulk moisture has moved through. The slab is getting close to stable equilibrium with ambient air.
- Day 28+: You can begin moisture testing to verify readiness.
The exact timeline depends on your slab thickness, how long it was wet, soil conditions below the slab, and your ambient humidity. A basement that sat under 3 inches of water for 5 days will need longer than a garage that took an inch for 24 hours.
How to Moisture Test Before Coating
There are two professional methods for testing concrete moisture before coating:
Calcium Chloride Test (ASTM F1869): A measured amount of calcium chloride is sealed to the concrete surface for 60–72 hours. The absorbed weight indicates the moisture vapor emission rate (MVER). Most epoxy manufacturers require an MVER below 3–5 lbs per 1,000 sq ft per 24 hours.
In-Situ Relative Humidity Probe (ASTM F2170): Probes are drilled into the slab at 40% of depth and read after 72 hours. This method is more accurate for deep moisture. The target is typically below 75% RH for epoxy applications.
A competent contractor should perform one or both tests before any coating goes down on a post-flood slab. If they show up with a moisture meter (the handheld kind), hand-waving it across the surface, and declare it dry — that’s a red flag. Surface meters read surface moisture only. They don’t tell you what’s happening 40% through a 4-inch slab.
| Moisture Testing Method | Cost | Accuracy |
|---|---|---|
| Visual inspection | $0 | Unreliable |
| Surface moisture meter | $0–$50 (contractor tool) | Surface only |
| Calcium chloride test (ASTM F1869) | $100–$300 per test | MVER at surface |
| In-situ RH probe (ASTM F2170) | $150–$400 per test | Accurate full-depth |
Anti-Microbial Coatings: Do You Need One?
After flooding, mold growth in concrete is a real concern — especially in basements where organic material (dust, debris, old stains) may have been present in the concrete pores before flooding.
Standard epoxy doesn’t kill mold or inhibit growth. Anti-microbial additives or primers can be added to the system for $0.50–$1.50 per square foot additional cost. These are worth it in basement applications where post-flood mold is a documented concern, or anywhere you’ve seen visible mold growth on the slab during the drying period.
The sequence matters: any visible mold must be remediated before coating. Encapsulating mold under epoxy doesn’t stop it — the mold can continue to degrade the concrete beneath the coating, eventually causing adhesion failure. If mold remediation is needed, factor in $500–$2,500 for professional treatment before any coating work begins.
Cost Breakdown for Post-Flood Epoxy
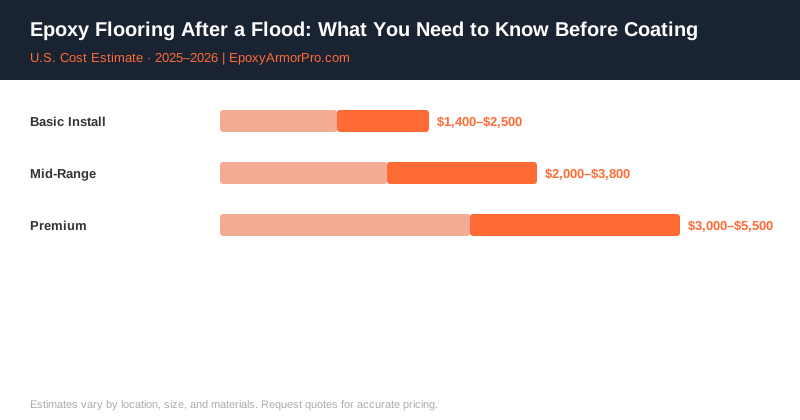
Post-flood applications cost more than standard installs because of the additional prep, testing, and treatment requirements.
| Component | Typical Cost |
|---|---|
| Moisture testing (2 methods) | $200–$600 |
| Mold remediation (if needed) | $500–$2,500 |
| Surface grinding/shot blasting prep | $0.50–$1.50/sq ft |
| Moisture-blocking primer (vapor barrier epoxy) | $0.75–$2.00/sq ft |
| Color coat + topcoat | $2.00–$5.00/sq ft |
| Total (2-car garage, 400 sq ft) | $2,500–$5,500 |
The single biggest cost driver is whether you need a vapor barrier primer. After significant flooding, you almost always do. Standard epoxy primers are not designed to resist ongoing vapor transmission — vapor barrier primers are specifically engineered for it, and they add $300–$800 to a typical garage job.
What About the Basement Epoxy Flooring Cost in Flood-Prone Areas?
Basements are where this issue is most critical. If you’re in a flood-prone area and you want a long-term basement floor coating, the right install sequence is: remediate, dry fully, test, moisture-blocking primer, then coating system. A contractor who skips any of those steps is selling you a floor that will fail.
The good news: a properly installed vapor barrier epoxy system in a basement performs extremely well long-term, even in areas with regular moisture issues. It won’t stop water intrusion during an active flood, but it will handle the ongoing moisture vapor that would otherwise destroy a standard coating.
The Bottom Line on Timing
The number one mistake post-flood homeowners make is installing too early. The pressure to get back to normal is completely understandable — but a failed epoxy floor 6 months later is a far worse outcome than waiting 5 extra weeks and doing it correctly.
Wait the 28-day minimum. Test before you coat. Use a vapor barrier primer. Get the mold remediation done if there’s any question. Then get quotes from contractors who explicitly discuss moisture testing and post-flood protocols — because a contractor who doesn’t mention those things isn’t the right contractor for your job.
Contractor Referral Disclaimer: EpoxyArmorPro is a contractor referral and cost information service, not a licensed flooring contractor. We connect consumers with independent, licensed, and insured contractors. We do not perform any flooring work directly. Cost estimates are averages based on market data and vary by location, project size, materials, and contractor. Always verify contractor licensing and insurance before hiring. Individual quotes may differ from estimates shown.